Changing a flat tire is one of those essential life skills that can save you from being stranded on the side of the road. Whether you’re a seasoned driver or a novice, knowing how to handle this common automotive emergency can make the difference between a minor inconvenience and a major headache. In this article, we’ll cover everything you need to know about emergency tire changing techniques, from preparation to execution. By the end, you’ll be equipped to handle a flat tire confidently and safely.
Why Tire Changing Matters
Flat tires happen unexpectedly—due to punctures from nails, glass, or road debris, or even from wear and tear. According to the National Highway Traffic Safety Administration (NHTSA), tire-related issues contribute to thousands of accidents annually. Being prepared can prevent you from waiting hours for roadside assistance, especially in remote areas or bad weather. Moreover, in emergencies, quick action can protect you and others on the road. This guide focuses on manual tire changing, assuming you don’t have run-flat tires or an automatic system.
Preparation: Gear Up Before You Go
Before you hit the road, ensure your vehicle is ready for a tire change. Most cars come with a spare tire, jack, and lug wrench, but it’s wise to check and supplement as needed.
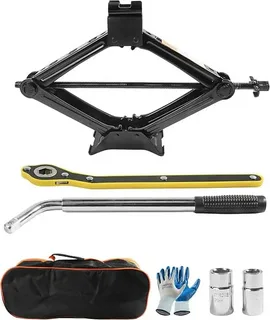
- Essential Tools: Locate your spare tire (usually in the trunk or under the vehicle), jack, lug wrench, and wheel wedges (or use rocks if unavailable). Carry a flashlight, reflective triangles, gloves, and a first-aid kit. If your car lacks these, invest in a roadside emergency kit.
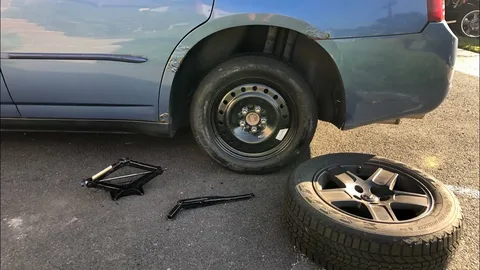
- Spare Tire Check: Inspect your spare regularly. Is it inflated? Does it match your other tires? Some spares are “donut” types for temporary use only—drive slowly (under 50 mph) and replace it soon.
- Additional Items: Keep a tire pressure gauge, tire plug kit for minor punctures, and a portable air compressor. In cold climates, include a blanket and warm clothing.
Preparation isn’t just about tools; it’s about mindset. Familiarize yourself with your car’s manual for specific jack points and procedures. Practice in a safe environment to build confidence.
Step-by-Step Tire Changing Guide
Once you’ve pulled over safely (on a flat, stable surface away from traffic), follow these steps. This process typically takes 15-30 minutes for beginners.
Step 1: Ensure Safety
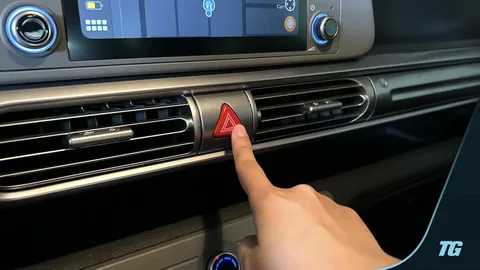
- Turn on your hazard lights and place reflective triangles 100-200 feet behind your vehicle.
- If possible, park on the shoulder with your wheels turned toward the curb.
- Keep passengers inside the vehicle or a safe distance away.
- Avoid changing tires on highways or in bad weather; call for help if conditions are unsafe.
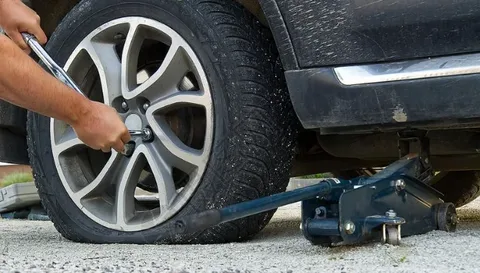
Step 2: Loosen the Lug Nuts
- Use the lug wrench to loosen the lug nuts on the flat tire. Turn them counterclockwise, but don’t remove them yet—just break the seal. This is easier when the tire is on the ground.
- If the nuts are stuck, apply penetrating oil and use leverage. Never use the jack to loosen them.
Step 3: Jack Up the Vehicle
- Consult your owner’s manual for jack points (usually marked on the frame).
- Position the jack securely under the designated point and raise the vehicle slowly until the flat tire is about 6 inches off the ground.
- Place wheel wedges or blocks behind the other wheels to prevent rolling.
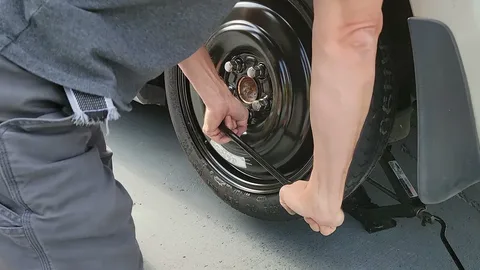
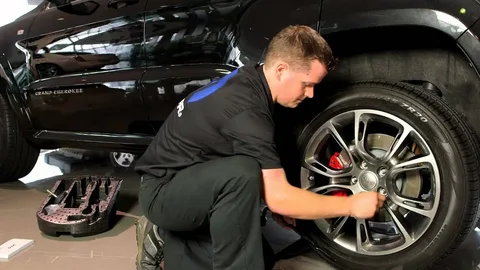
Step 4: Remove the Flat Tire
- Fully unscrew and remove the lug nuts, placing them in a safe spot (e.g., on the hubcap).
- Pull the flat tire straight off the wheel studs. If it’s stuck, gently kick the sidewall or use the jack handle for leverage.
Step 5: Mount the Spare
- Lift the spare onto the wheel studs, aligning the holes.
- Hand-tighten the lug nuts in a star pattern (not sequentially) to ensure even seating.
- Lower the vehicle slightly with the jack, then fully tighten the lug nuts in the same star pattern. Use your body weight for torque if needed, but avoid over-tightening.
Step 6: Lower and Secure
- Fully lower the jack and remove it.
- Double-check lug nut tightness and stow tools.
- Drive cautiously to a service center to repair or replace the tire.
Safety Precautions: Prioritize Protection
Safety is paramount during tire changes. Mishandling can lead to injury or vehicle damage.
- Physical Risks: Wear gloves to avoid cuts from sharp debris. Never get under the vehicle while it’s jacked—use the jack stand if available. Avoid smoking or open flames near the vehicle.
- Traffic Hazards: Change tires only in safe spots. If on a busy road, wait for help. At night, use headlights and a flashlight.
- Weather Considerations: In rain or snow, cover the area with a tarp. Cold weather can make metal brittle, so warm tools if necessary.
- Health and Age Factors: If you’re elderly, pregnant, or have mobility issues, prioritize calling professionals. Children should stay clear.
Remember, a jacked vehicle can fall if unstable—never leave it unattended.
Common Mistakes and How to Avoid Them
Even experienced drivers err. Here are pitfalls to dodge:
- Over-Tightening Lug Nuts: This can warp rotors. Tighten to the manufacturer’s spec (usually 80-100 ft-lbs).
- Wrong Jack Placement: Using the wrong point can damage the frame. Always reference the manual.
- Ignoring the Spare’s Limits: Donut spares aren’t for long distances. Get a full repair ASAP.
- Forgetting to Tighten: Loose nuts cause vibrations or wheel loss. Recheck after a few miles.
- Rushing: Haste leads to errors. Stay calm and methodical.
If you encounter issues like a seized lug nut, a bent rim, or no spare, call roadside assistance immediately.
When to Call for Help
Not every flat requires DIY. Seek professional help if:
- You’re on a highway or in danger.
- The tire is damaged beyond a simple puncture (e.g., sidewall tear).
- You lack tools or strength.
- It’s your first time and you’re unsure.
- Weather or location makes it risky.
Services like AAA or towing companies can handle it quickly. Many insurance policies cover roadside assistance.
Advanced Tips for Tire Maintenance
Prevention beats cure. Regularly check tire pressure (aim for 30-35 PSI), tread depth (replace at 2/32 inch), and alignment. Rotate tires every 5,000-8,000 miles. Invest in quality tires and consider run-flat options for modern vehicles.
For minor punctures, use a plug kit: Insert the plug, inflate, and drive to a shop. Avoid this for large holes.
In off-road scenarios, carry a full-size spare and recovery gear like a winch.
Conclusion: Empowerment Through Knowledge
Knowing how to change a tire empowers you as a driver, reducing stress in emergencies. By preparing your vehicle, following safe steps, and avoiding common mistakes, you can handle flats efficiently. Remember, practice makes perfect—consider a hands-on session at a driving school. Stay safe on the roads, and always prioritize caution over speed. With these techniques, you’re ready for whatever the road throws at you.
Leave a Reply