Changing a flat tire is a rite of passage for drivers, and at the heart of this process are two indispensable tools: the jack and the lug wrench. These simple yet powerful devices allow you to lift your vehicle and remove or secure the wheels, turning a potential roadside nightmare into a manageable task. Whether you’re a weekend mechanic or someone who just wants to be prepared, understanding how to use a jack and lug wrench properly can save time, money, and stress. In this comprehensive guide, we’ll delve into their design, usage, safety protocols, and more, equipping you with the knowledge to handle tire emergencies confidently.
The Evolution and Importance of Jacks and Lug Wrenches
The jack and lug wrench have roots in the early automotive era. The first car jacks emerged in the late 19th century, evolving from simple screw mechanisms to hydraulic models. Lug wrenches, originally just bars for turning nuts, became standardized with the rise of the automobile. Today, they’re standard equipment in most vehicles, mandated by safety regulations in many countries.
Why are they crucial? According to the National Highway Traffic Safety Administration (NHTSA), tire failures cause over 200 fatalities annually in the U.S. alone. A properly executed tire change can prevent accidents by getting you off the road quickly. Moreover, in remote areas or during bad weather, these tools can be lifesavers. Beyond emergencies, they enable routine maintenance like wheel rotations. Misuse, however, can lead to injuries or vehicle damage, underscoring the need for proper education.
Understanding the Jack: Types and Features
A jack is a mechanical device designed to lift heavy loads, specifically vehicles, by applying force through leverage. It’s not just a tool—it’s a safety-critical component that must be used correctly to avoid collapses.
Types of Jacks
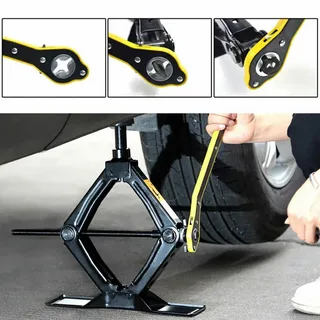
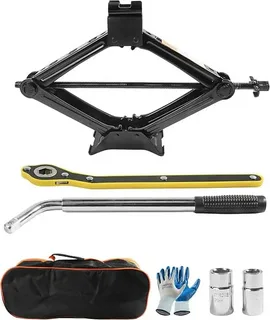
- Scissor Jack: The most common type for passenger cars. It resembles a pair of scissors that expand to lift the vehicle. Compact and lightweight, it’s stored in the trunk but has limited lifting height (usually 12-18 inches).
- Floor Jack (Hydraulic): Preferred by professionals for its stability and power. It uses hydraulic pressure to lift heavier loads, like trucks or SUVs, up to 4-6 tons. More expensive and bulkier, it’s ideal for home garages.
- Bottle Jack: A vertical hydraulic jack shaped like a bottle, great for high-clearance vehicles. It’s portable but requires careful positioning.
- Air Jack: Inflatable bags that use compressed air for lifting. Safer on uneven surfaces but less common in standard kits.
Key Features and Ratings
Jacks have a base for stability, a lifting arm, and a handle for operation. Always check the weight rating (e.g., 2 tons for cars) to ensure it matches your vehicle. The lifting point is critical—most cars have reinforced jack points marked on the frame. Using the wrong spot can cause structural damage.

Understanding the Lug Wrench: Design and Purpose
The lug wrench, also known as a tire iron, is the counterpart to the jack. It’s a long, sturdy bar used to loosen and tighten the lug nuts that hold the wheel in place.
Design and Variations
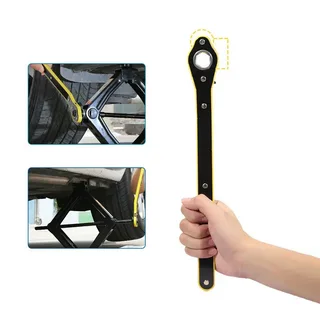
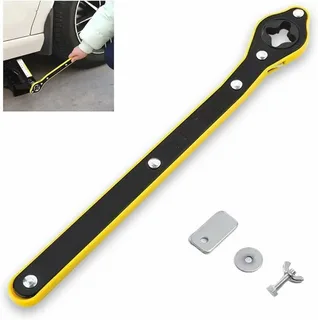
- Standard Lug Wrench: An L-shaped or straight bar with a socket at one end (typically 17-21 mm to fit common lug nuts). The other end often doubles as a pry bar or handle for extra leverage.
- Cross or X-Shaped Wrench: Features multiple sockets for different nut sizes, allowing one tool to handle various wheels.
- Breaker Bar: A longer version (up to 3 feet) for high-torque applications, often used with extensions for stubborn nuts.
- Multi-Tool Kits: Some wrenches include adapters for sockets or even integrate with the jack handle.
Lug nuts are threaded bolts that secure the wheel to the hub. They require significant torque—around 80-100 foot-pounds for most cars—to prevent loosening while driving. The wrench’s length provides mechanical advantage, turning rotational force into torque.
Step-by-Step Guide to Using Jack and Lug Wrench
Proper usage follows a sequence to ensure safety and efficiency. Always refer to your vehicle’s owner’s manual for model-specific instructions. Here’s a detailed breakdown:
Preparation
- Park Safely: Pull over on a flat, stable surface away from traffic. Engage the parking brake and turn on hazard lights. Place wheel chocks or rocks behind the other tires to prevent rolling.
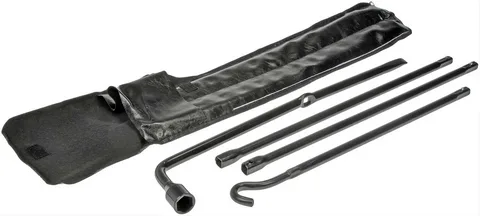
- Gather Tools: Locate the jack, lug wrench, spare tire, and any wedges. Inspect for damage—if the jack is rusty or the wrench bent, don’t use them.
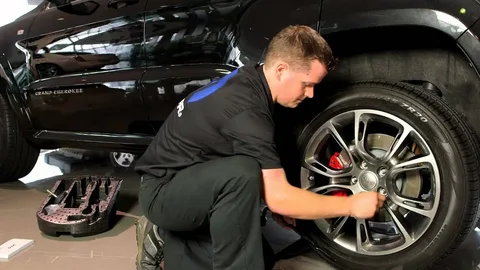
- Loosen Lug Nuts: While the tire is on the ground, use the lug wrench to loosen the lug nuts counterclockwise. Apply steady pressure; if they’re tight, stand on the wrench for leverage. Don’t remove them yet—this step is easier with the tire grounded.
Jacking Up the Vehicle
- Position the Jack: Find the jack point nearest the flat tire (usually under the door sill or rocker panel). Place the jack’s base flat and secure. For scissor jacks, align the saddle with the point.
- Lift Slowly: Insert the handle and turn clockwise to raise the vehicle. Go slowly—stop when the flat tire is 6-8 inches off the ground. Never crawl under the vehicle at this stage; use a jack stand if available for added security.
- Check Stability: Ensure the jack is firm. If it sinks into soft ground, place a board under it.
Removing and Replacing the Tire
- Remove Lug Nuts: Fully unscrew and remove the lug nuts, keeping them organized (e.g., on the hubcap).
- Pull Off the Tire: Grip the tire firmly and pull it straight off the studs. If stuck, gently rock it or use the lug wrench as a lever.
- Mount the Spare: Align the spare’s holes with the studs and push it on. Hand-tighten lug nuts in a star pattern (alternating sides) to seat the wheel evenly.
- Lower and Tighten: Slowly lower the jack by turning counterclockwise. Once down, use the lug wrench to fully tighten lug nuts in the same star pattern. Apply torque gradually—over-tightening can strip threads or warp rotors.
Final Steps
Stow the tools and flat tire securely. Drive cautiously to a repair shop, as spares are often temporary. Recheck lug nut tightness after 50-100 miles.
This process typically takes 15-30 minutes for beginners. Practice in a controlled environment to build muscle memory.
Safety Precautions: Protecting Yourself and Your Vehicle
Safety is non-negotiable. Improper jack or wrench use can result in the vehicle falling, causing severe injury or death.
- Physical Safety: Wear gloves to avoid cuts from sharp edges. Never stand directly under a jacked vehicle—position yourself to the side. If the jack slips, jump clear.
- Environmental Factors: Avoid jacking on slopes, soft ground, or in high winds. In cold weather, warm the tools to prevent brittleness. At night, use lights and reflective gear.
- Traffic Risks: Change tires only in safe spots. If on a highway, call for help. Keep passengers inside or away.
- Health Considerations: If you have back issues or are elderly, opt for assistance. Children should not participate.
- Tool Integrity: Inspect for wear—replace damaged jacks immediately. Lubricate hydraulic jacks annually.
NHTSA reports that improper jacking causes many accidents, so prioritize caution.
Common Mistakes and Troubleshooting
Even experts slip up. Here are frequent errors and fixes:
- Wrong Jack Point: Leads to frame damage. Always use designated spots.
- Over-Tightening Lug Nuts: Can cause vibrations or breakage. Use a torque wrench for precision.
- Rusty or Seized Nuts: Apply penetrating oil and let it soak. If unsuccessful, use an impact wrench or seek professional help.
- Jack Failure: If it won’t lift, check for air in hydraulics or damage. Never force it.
- Losing Lug Nuts: Place them in a magnetic tray or marked spot.
- Uneven Tightening: Always use the star pattern to distribute force.
Troubleshooting tip: If the wrench slips, ensure the socket fits snugly. For electric vehicles with alloy wheels, avoid over-torquing to prevent cracking.
Maintenance and Care for Jacks and Lug Wrenches
To extend tool life:
- Cleaning: Wipe off dirt and grease after use. Store in a dry place to prevent rust.
- Inspection: Check for bends, cracks, or hydraulic leaks monthly. Test jacks by lifting a known weight.
- Lubrication: Oil moving parts on scissor jacks. For hydraulics, bleed air if needed.
- Storage: Keep in the vehicle’s designated compartment or a toolbox.
Replace tools every 5-10 years or after heavy use. Investing in quality brands like Craftsman or OEM equivalents ensures reliability.
Alternatives and Modern Innovations
Not everyone needs to DIY. Roadside assistance services (e.g., AAA) provide mobile tire changes. For tech-savvy drivers, consider:
- Portable Inflators: For minor flats, avoiding full changes.
- Run-Flat Tires: Allow driving on flats for short distances.
- Electric Jacks: Battery-powered for easier lifting.
- Apps and Guides: Use smartphone apps for visual tutorials.
In professional settings, pneumatic wrenches speed up the process, but for emergencies, stick to basics.
Conclusion: Empowering Safe Driving
Mastering jack and lug wrench usage transforms you from a helpless motorist into a self-reliant driver. By understanding their mechanics, following safe procedures, and avoiding pitfalls, you can handle tire changes efficiently. Remember, preparation and practice are key—review your manual and simulate changes at home. Stay safe on the roads; these tools are your allies in unexpected situations. With knowledge and caution, you’ll navigate flats with ease.

Leave a Reply